
Here is a Tutorial I made for a message board I'm on.
I got this idea from another message board I'm on, and I decided to make my own tutorial. And this was the finished product.
MARBLE MAGNET TUTORIAL (11/2009)
By: Eljae Lane
I decided to use some Christmas greeting cards I had and make marble magnets with them.
Super easy project, Fairly cheap. Quick.
What you need....
-Marble Accents (you can find them in the craft store next in the floral department, in Various sizes. In my case, I used a medium size. They are clear glass pieces that are flat on the bottom.)
-Little Magnents (Craft store, usually near beading..)
-Mod Podge (or your favorite clear drying crafting glue. I like Mod Podge)
-Epoxy (Both Mod Podge & epoxy can be found in the obvious glue area of the craft store)
-Small Paint Brush, to glide the glue on to the design.
-And some design you wanna turn into a magnent. I used Christmas Greeting cards. (duh)
-Exacto Knife.
STEPS:
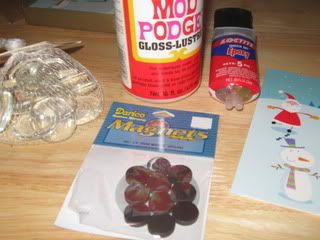
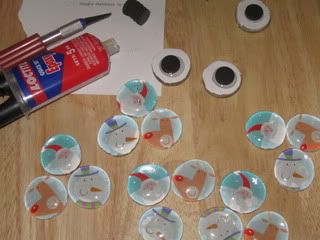
1. Gather all your materials together.
(These are mine, minus the brush, and exacto knife)
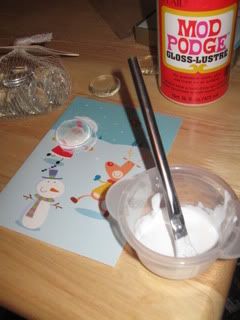
2. With your clear drying glue, coat the part of the image you want to be a magnent.
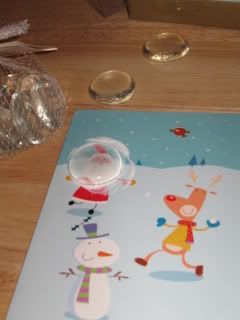
3. Also put a thin layer of your clear drying glue on the flat part of the Marble.
4. Put the Marble on where your image, and press tightly so that all the air bubbles smooth out.
5. Continue process until you are done with all your marbles. On all the images you want to become magnents.
6. Let dry over night/all day.
7. Now they're dry, so you need your exacto knife. Cut out all the marble image pieces.
8. All you need to do now is to get your magnents and your epoxy. Put Epoxy on the back of the magnents, then attach to the marbles. (This epoxy I used you have to mix slightly)
(The kind of epoxy I used is quick drying. 5 mins. Took more like ten.)
9. Let dry over night again.
10. ENJOY, or gift!
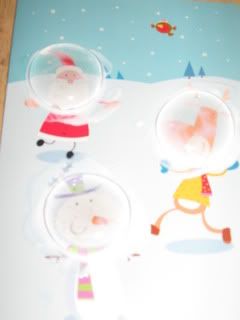
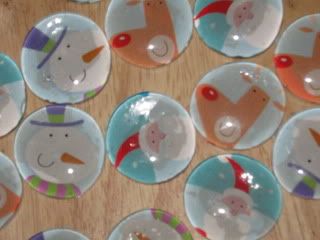
THESE ARE MY FINISHED PRODUCT!!
I got this idea from another message board I'm on, and I decided to make my own tutorial. And this was the finished product.
MARBLE MAGNET TUTORIAL (11/2009)
By: Eljae Lane
I decided to use some Christmas greeting cards I had and make marble magnets with them.
Super easy project, Fairly cheap. Quick.
What you need....
-Marble Accents (you can find them in the craft store next in the floral department, in Various sizes. In my case, I used a medium size. They are clear glass pieces that are flat on the bottom.)
-Little Magnents (Craft store, usually near beading..)
-Mod Podge (or your favorite clear drying crafting glue. I like Mod Podge)
-Epoxy (Both Mod Podge & epoxy can be found in the obvious glue area of the craft store)
-Small Paint Brush, to glide the glue on to the design.
-And some design you wanna turn into a magnent. I used Christmas Greeting cards. (duh)
-Exacto Knife.
STEPS:
1. Gather all your materials together.
(These are mine, minus the brush, and exacto knife)

2. With your clear drying glue, coat the part of the image you want to be a magnent.
3. Also put a thin layer of your clear drying glue on the flat part of the Marble.
4. Put the Marble on where your image, and press tightly so that all the air bubbles smooth out.

5. Continue process until you are done with all your marbles. On all the images you want to become magnents.


6. Let dry over night/all day.
7. Now they're dry, so you need your exacto knife. Cut out all the marble image pieces.
8. All you need to do now is to get your magnents and your epoxy. Put Epoxy on the back of the magnents, then attach to the marbles. (This epoxy I used you have to mix slightly)

(The kind of epoxy I used is quick drying. 5 mins. Took more like ten.)
9. Let dry over night again.
10. ENJOY, or gift!
THESE ARE MY FINISHED PRODUCT!!

No comments:
Post a Comment